Create an Email Template
Step 1: Go to Template
Go to [Template] in [My Setup].
![Click [My Setup] at the top right corner](../../../resources/img/campaign/create-an-email-template/en-01-27d2cc7079.png)
![Select [Template Management]](../../../resources/img/campaign/create-an-email-template/en-02-a41b549933.png)
Enter [Campaign] Section, click the [Template] button at the top right corner.
![Shortcut under the [Campaign] section](../../../resources/img/campaign/create-an-email-template/en-03-7fa5613d0f.png)
Step 2: Create an Email Template
Click the [Create Email Template] button at the top right corner.
![Click [New Email Template]](../../../resources/img/campaign/create-an-email-template/en-04-e12fa19026.png)
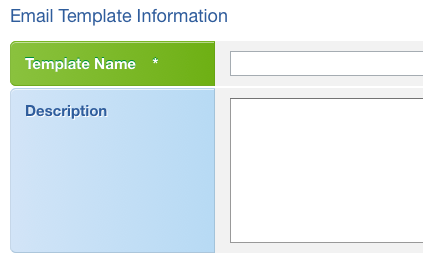
Step 3: Name The Template
Give a name to the template.
Step 4: Choose The Access Type
Choose the access type of the template.

Tips
If the email template is public, other users can use and modify this template as well.
Step 5: Give an Email Subject
Give a subject to the email.

Step 6: Prepare The Email Content
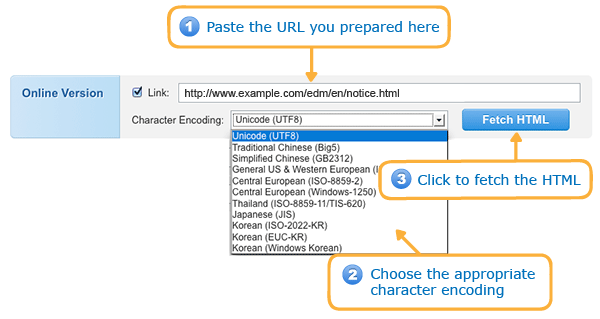
Method 1: Fetch Online Version HTML Code
If you have already created the online version for the email content, load the URL directly.
Remember to choose the appropriate character encoding.
Method 2: Write a HTML Email Directly
You can write a HTML email in the HTML editor.
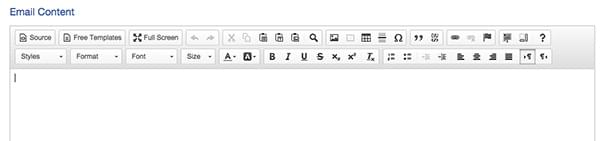
Tips
The system provides some free templates to you. You can click the [Free Templates] button in the HTML editor and choose a template to add your own contents.

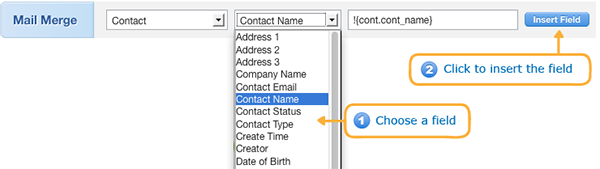
Step 7: Insert the Personalized Data Field
Choose the personalized data field and insert it to the appropriate location.
Click the [Save] button when you have finished.