Import Contacts
The system allows import of the following records:
- Contact
- Company (available to Sales Force Automation only)
- Lead (available to Sales Force Automation only)
- Product (available to Sales Force Automation only)
In the following, we are going to take importing a contact data file as an example.
Reminder
Before you import your contacts, please check if the built-in data fields fit your need or set up your fields first.
Learn more about setting up your contact fields.
Step 1: Prepare Your File
To import external data into the system, please prepare your source file in Comma Separated Value (.csv) or Excel 97-2003 (.xls) format.
Beware of the following common problems in your file.
No Contact Name
- Contact Name is a required field which identifies individual contact in the database. If your source file has the email address column only, you may consider duplicating this column as the Contact Name column.
Invalid Email Address
- The format of email address should be something likes xxx@xxx.com. If a contact has multiple email addresses, you should add new custom fields to store the extra ones.
- A valid email address should not contain space, comma nor any other punctuations.
Step 2: Go to Data Import
Click [Tools] at the top right corner of screen.
![Click [Tools]](../../../resources/img/import-and-export/import-contacts/en-01-8b8df3142e.png)
Select [Data Import].
![Select [Data Import]](../../../resources/img/import-and-export/import-contacts/en-02-ab5d0493fc.png)
Then click [Import Data] at the top right corner to import your contacts.
![Click [New Import]](../../../resources/img/import-and-export/import-contacts/en-03-2b11a255fa.png)
Go to section [Contact] and click [Import Contact] at the top right corner.
![Shortcut in section [Contact]](../../../resources/img/import-and-export/import-contacts/en-04-84bb6cec18.png)
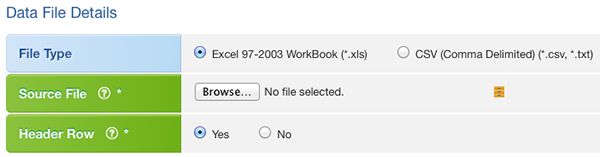
Step 3: Select Import File
Choose your source file and its file type.
Tips
If your source file has a header row, select [Yes] to [Header Row]. Content in this row will be used for data field matching only (it will not be imported as data record).
Tips
You can select the source file either from your local computer or the system (Repository). To select a file which you have uploaded, just click the [Repository] icon and pick it.
![Click the [Repository] icon to view your repository](../../../resources/img/import-and-export/import-contacts/en-06-a476e7acbb.png)
Step 4: Create Group
Imported contacts can not be used for email or SMS campaign unless they are being included in a group. Do this immediately by choosing [Create Group] for imported contacts and naming your group.
![Generate a [Group] to include all imported contacts](../../../resources/img/import-and-export/import-contacts/en-07-2a1e416ac7.png)
If you want to add imported contacts to an existing group instead, you can choose [Append to Group] and select the group.
![Choose the [Group] that you want to append to](../../../resources/img/import-and-export/import-contacts/en-08-97a5e59dba.png)
If you want to add the contacts into system database only, you should choose Do Nothing.
![No [Group] will be generated](../../../resources/img/import-and-export/import-contacts/en-09-da46a61d4e.png)
Tips
No matter you are creating a group or not during import, contacts imported are always stored into the same pool as the system database.
Click [Next] to upload the source file now and proceed to data field mapping.
Step 5: Map Data Fields
Match your source file fields with the system data fields. Only match fields you need and skip those unnecessary (choose [Do Not Import] for unwanted columns).
![Match your [Header Row] fields with the system data fields](../../../resources/img/import-and-export/import-contacts/en-10-337f8acbf7.png)
Tips
[Do Not Import] a particular field/column means that the whole column of data will not be imported.
Step 6: Identify Lookups
After field mapping, you need to select field(s) for duplicate lookups. This avoids duplicated records in the database.
Selected field(s) are combined together as Comparison Field. If the combined result is empty, then no comparison can be made, that row of data will be discarded.
By default, system will use [Contact Email] or [Contact Mobile] as default [Comparison Field].
If you want to change the [Comparision Field], click [Change Settings].
![System will pre-select the [Comparision Field]. Click [Change Settings] to modify](../../../resources/img/import-and-export/import-contacts/en-11-359bf369a2.png)
In edit mode, you can select the field in the drop-down list.
![Change the [Comparision Field]](../../../resources/img/import-and-export/import-contacts/en-16-a1f98566c0.png)
Tips
Try to select one field only where its data is unique among contacts. (e.g. membership ID, email address).
Caution!
Never use Contact Name as the sole checking field as there may be two different persons having the same name. Example:
| Contact Name | Contact Email | Identify as Duplicates? |
|---|---|---|
| Amy Wong | amywong@hotmail.com | YES |
| Amy Wong | wongamy@hotmail.com |
Wrong identification result because of inappropriate field(s) selection. They are two different persons who are just lucky enough to have the same name.
Caution!
Never select more than one field for duplicate identification unless you know what you are doing. When multiple fields are selected, record will be regarded as duplicate only when data of ALL selected fields are the same (it is an AND condition, not a OR condition). For example, if you select Contact Name and Contact Email as the checking fields:
| Contact Name | Contact Email | Identify as Duplicates? |
|---|---|---|
| John | john.doe@company.com | NO |
| John Doe | john.doe@company.com |
Wrong identification result again because of inappropriate field(s) selection. They should be regarded as the same person since normally no two persons share the same email address.
After changing the [Comparison Field] for duplicates lookup, you can decide the way to handle duplicates in edit mode as well.
If you want to update existing records with data of the new record, please select [Overwrite] or otherwise [Do Not Import], under [Action on Duplicates].
By default, system will pre-select [Overwrite] as the default action.

Tips
| Overwrite | Records in your file will overwrite duplicates in database, so that the centralized database will always be updated (default choice, generally correct). |
|---|---|
| Do Not Import | When records in your file duplicate with records in the database, they will be skipped and not imported, existing records in database will not be modified (this saves import time as fewer records will be updated). |
Step 7: Save Import Template
Finally, you can click the [Start Import] button to begin your import.
![Click [Start Import] to begin the import](../../../resources/img/import-and-export/import-contacts/en-13-b397d848eb.png)
Save future import hassles for source files of the same structure and preferences by saving all settings as an import template (optional).
![Enter a template name then click [Save]](../../../resources/img/import-and-export/import-contacts/en-14-89d404ccd8.png)
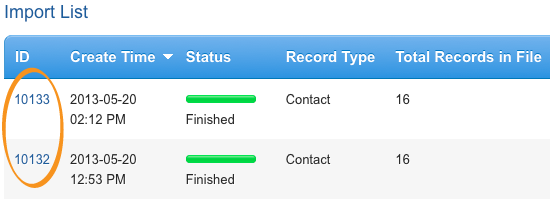
Step 8: Check Import Progress
You can check your import progress and details at any time by clicking the corresponding ID in the Import List.