Set Up Your Own Dashboard
The process of setting up a dashboard includes:
- Creating basic [Dashboard Blocks] and,
- Grouping multiple [Dashboard Blocks] into a single [Dashboard View].
Go to Dashboard Management
In [My Setup], enter [Dashboard] section.
![Click [My Setup]](../../../resources/img/sales-force-automation/set-up-your-own-dashboard/en-01-27d2cc7079.png)
![Select [Dashboard]](../../../resources/img/sales-force-automation/set-up-your-own-dashboard/en-02-423e4ebdc0.png)
Create A Dashbord Block
Step 1: Go to the Create block Page
Create a new dashboard block by clicking [Create Block] button under the [Dashboard Block List] table.
![Click [Create Block]](../../../resources/img/sales-force-automation/set-up-your-own-dashboard/en-03-8bf17d198f.png)
Step 2: Set The Criteria
Set the criteria for the block list.

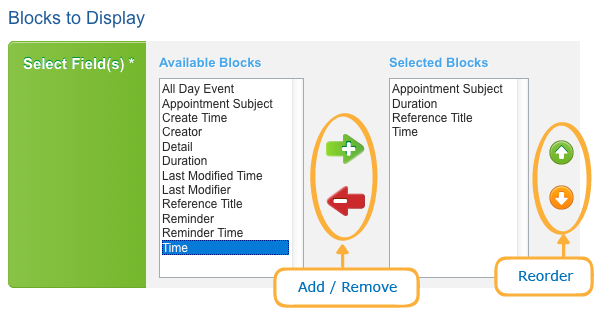
Step 3: Choose Fields to Display
Choose which fields should be displayed in the block, and reorder them.
Step 4: Block Settings
[Name]: Give a name to the block.
[Sort By]: Choose a field as the default sort key.
[Sorting Order]: Sorting in Ascending order or Descending order
[Default List Size]: Set the number of records shown in this block
["More" List Size]: Set the number of records shown when you click [More].
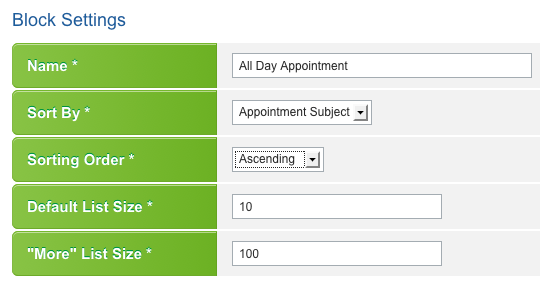
After filling in the form, click [Save].
Create A Dashboard View
Step 1: Go to the Create View Page
Create a new dashboard view by clicking [Create View] under the [Dashboard View List] table.
![Click [Create View]](../../../resources/img/sales-force-automation/set-up-your-own-dashboard/en-07-635f1a97b5.png)
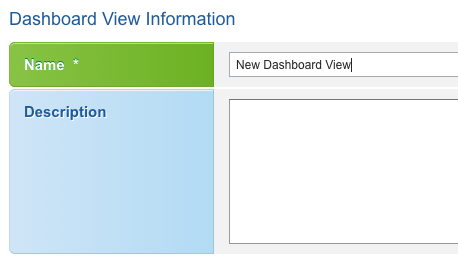
Step 2: Name the Dashboard View
Give a name and the description (if needed) to this dashboard view
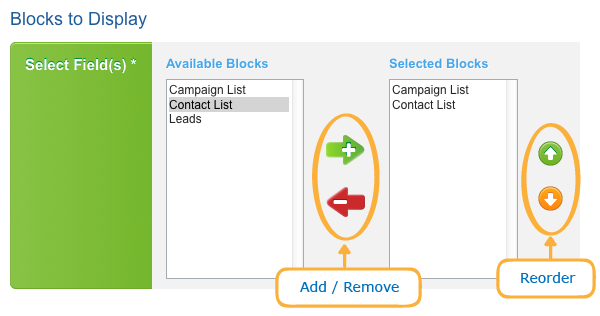
Step 3: Choose Blocks to Display
Select blocks which should be displayed in this view, and reorder them.
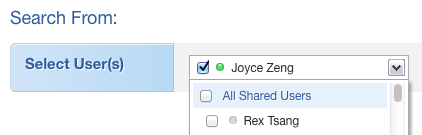
Step 4: Extract Data
Decide to extract which users data to show in this view.
Then click [Save].
Tips
- Multiple [Dashboard Views] can be created for different sales reports.
- A [Dashboard Block] is the most basic unit which can be used in multiple [Dashboard Views] simultaneously.