Set Up Contact Fields
Before you import a contact file or key in any new contact, please check whether the built-in data fields fit your need.
Step 1: Go to Data Field Customization
Click [Admin] at the top right corner of screen.
![Click [Admin]](../../../resources/img/settings/set-up-contact-fields/en-01-78c3a96d78.png)
Select [Data Field].
![Select [Data Field]](../../../resources/img/settings/set-up-contact-fields/en-02-b17e8f8454.png)
Then select record type [Contact].
![Select [Contact]](../../../resources/img/settings/set-up-contact-fields/en-03-f0f31a6464.png)
Alternatively, you can enter [Contact] section, then click [Set Up Contact Field] at the top right corner.
![Shortcut under [Contact] section](../../../resources/img/settings/set-up-contact-fields/en-04-5315376270.png)
Step 2: Identify Built-in Data Fields
Check whether the built-in data fields fit your need.
![Built-in Data fields under [Contact]](../../../resources/img/settings/set-up-contact-fields/en-05-1dbdbe3e87.png)
Step 3: Modify Data Field (Name & Choices)
You can rename data field or edit field options. Rename data field by clicking the [Rename] button.
![Rename data field by clicking the [Rename] button](../../../resources/img/settings/set-up-contact-fields/en-06-c9fa68091a.png)
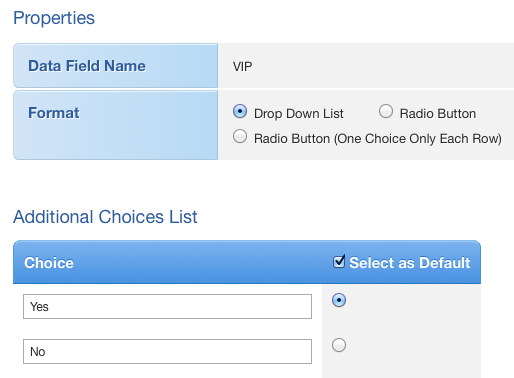
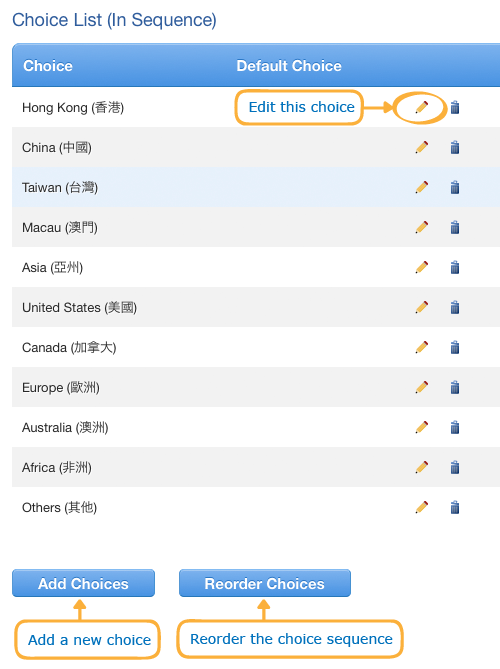
Click the [Edit Choices] button to modify options in [Single Choice] or [Multiple Choices] field.
![Modify options by clicking the [Edit Choices] button](../../../resources/img/settings/set-up-contact-fields/en-07-9215ffdcc0.png)
Step 4: Modify Data Field (Attributes & Sequence)
You can disable unnecessary data fields, set fields as required or modify their input sequence. First, click [Edit Data Field Attributes] at the top right hand corner.
![Click the [Edit Data Field Attributes] button](../../../resources/img/settings/set-up-contact-fields/en-09-50c080f38f.png)
If you want to disable a data field, uncheck its [Enabled] status.
![Uncheck the [Enabled] checkbox to disable a field](../../../resources/img/settings/set-up-contact-fields/en-10-cbcc6e13bb.png)
If you want to set a data field as required, check its [Required] status.
![Check the [Required] checkbox to mark a field as required](../../../resources/img/settings/set-up-contact-fields/en-11-70a3294c12.png)
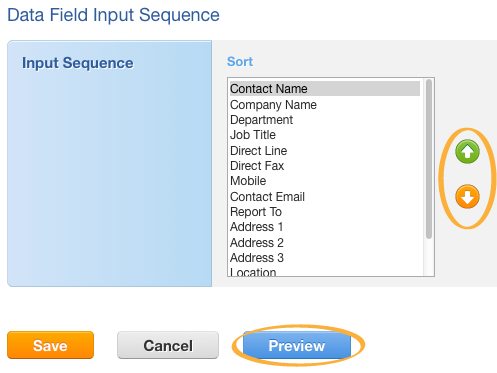
You can reorder input sequence of data fields. When done, you can preview the input form.
Step 5: Create New Data Field
You can create custom field if you want. Click the [Create Custom Data Field] button under [Custom Data Field List].
![Click the [Create Custom Data Field] button to create a new data field](../../../resources/img/settings/set-up-contact-fields/en-13-2e6a4fc168.png)
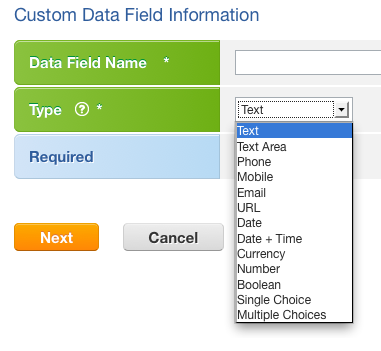
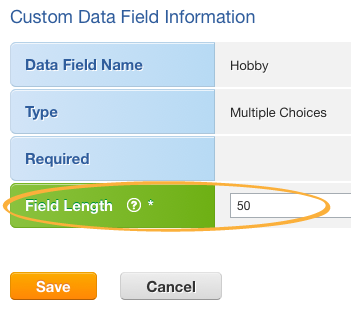
Name your field and choose an appropriate data type.
Tips
The following data types are available.
| Text | Characters limited to a row |
|---|---|
| Text Area | Characters in multiple rows |
| Phone | Less than 50 characters in a row |
| Mobile | Numbers, comma, hyphen, space and # only (e.g. 3593 9333) |
| In the format of an email address, such as 123@abc.com | |
| URL | In the format of a website address, such as www.abc.com |
| Date | In the format yyyy-mm-dd, such as 2013-04-01 |
| Date + Time | In the format yyyy-mm-dd HH:MM, such as 2013-04-01 23:59 |
| Currency | Numbers only, currency symbol will be displayed automatically |
| Number | Numerical characters |
| Boolean | Choices of yes and no only |
| Single Choice | Single option (in text format) for selection |
| Multiple Choices | Multiple options (in text format) for selection |
Define field length by specifying the maximum number of characters/digits allowed.
Tips
Field length can not be altered once a field is created.
Set up data field choices if you have chosen single choice or multiple choices data type.