Access Control
By default, each user can read their own data only, while the supervisor can read subordinate's records.
However, you can create the scenario for your company through the control on access rules, transfer control and access groups.
Hierarchy Access
The system provides the following 3 types of access rights on subordinates' records:
- Read records
- Write records
- Delete records
The default setting is [Read only]. You could modify it at the section of [Access Control] in [Admin].
Step 1: Go to Access Control
Go to [Access Control] in [Admin]
![Click [Admin]](../../../resources/img/settings/access-control/en-01-78c3a96d78.png)
![Select [Access Control]](../../../resources/img/settings/access-control/en-02-179bbbea64.png)
Step 2: Go to the Edit Page
Click the [Edit] button under the access table.
![Click [Edit] to edit hierarchy access](../../../resources/img/settings/access-control/en-03-3a6ad26942.png)
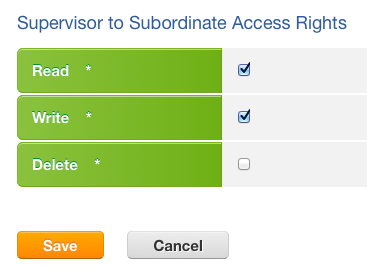
Step 3: Enable the Access
Enable or disable the access. Then click [Save].
Tips
Learn more about building users hierarchy structure.
Access Rule
By default, records are private to other users except your supervisor.
If you want to grant the access to users in peer group, you need to add a new access rule.
Step 1: Go to Access Control
Enter [Access Control] in [Admin]
Step 2: Create New Access Rule
Click [Create Access Rule] under the [Access Rule List] table.
![Click [Create Access Rule]](../../../resources/img/settings/access-control/en-05-54ea5557a0.png)
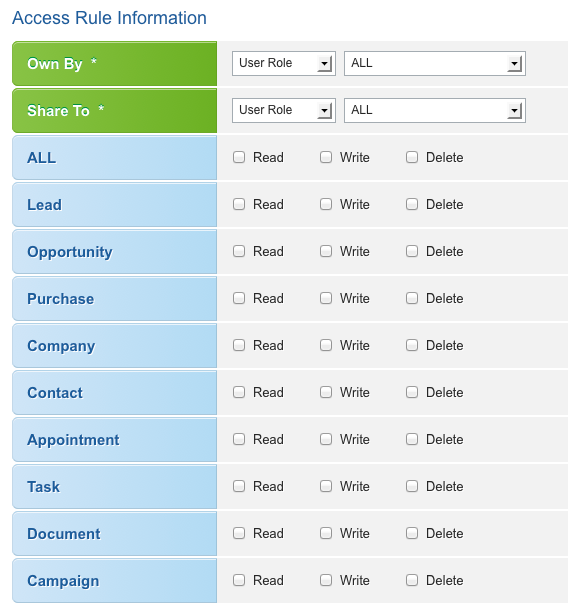
Step 3: Enable the Access
Transfer Control
By default, only supervisor can transfer records to subordinates.
If you want to allow subordinates transferring records to supervisor or users in peer group, you need to add a transfer control list.
Step 1: Go to Access Control
Enter [Access Control] in [Admin].
Step 2: Create New Transfer Rule
Click the [Create Transfer Rule] button under the [Transfer Rule List] table.
![Click the [Create Transfer Rule] button to create new rule](../../../resources/img/settings/access-control/en-07-95cc2f148b.png)
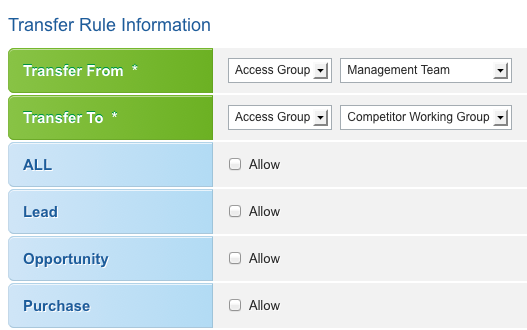
Step 3: Enable the Access
Access Group
As mentioned above, you can control the data access between different user roles, but how about some users instead of all users within the same group?
You need to create new access groups at the section of [User] in [Admin] panel.
Following are the common groups:
| Boss and Secretary | Secretaries always need to handle tasks from boss, so they may need to search data and distribute sales lead for him. |
|---|---|
| Team Based Users | They works as a team, so may need to share records to other users. |
Step 1: Go to User
Enter [User] in [Admin].
![Click [Admin]](../../../resources/img/settings/access-control/en-09-78c3a96d78.png)
![Select [User]](../../../resources/img/settings/access-control/en-10-2181bba985.png)
Step 2: Create New Access Group
Click the [Create Access Group] button under the [Access Group List] table.
![Click the [Create Access Group] button to create access group](../../../resources/img/settings/access-control/en-11-730aa74574.png)
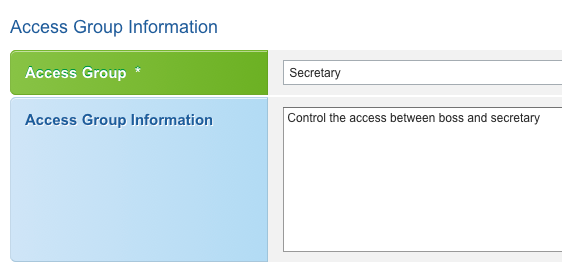
Step 3: Name the Group
Give a name to this group and fill in the description of this group (if needed).
Step 4: Choose Group Members
Then choose users who you want to add to this access group.
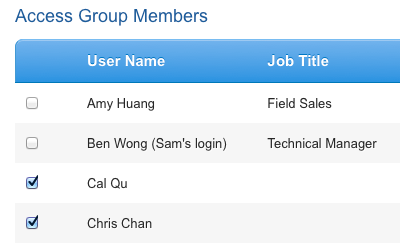
Then click [Save].
Tips
Learn more about [User Role].